EDX SignalPro licensed with one or all the modules below will require a channel plan.
5G
LTE
LoRa
WiMAX
Mobile/Cellular
User that do not have a channel template will be able to create one within SignalPro
You can create/edit a channel plan template file by going to
Utilities>Create/edit Channel plan template (.cpt) file.
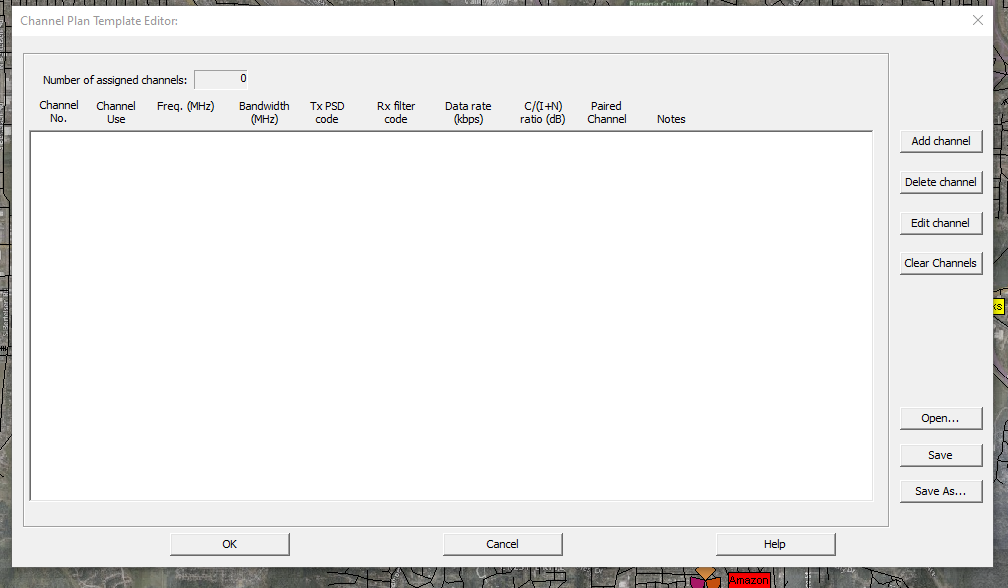
Within the Dialog, you can see sample cpt files by selecting the “Open…” button.
To create a new channel simply click the “Add Channel” button in the upper right corner. This will bring up a dialogue that will allow you to change the values of that specified channel.
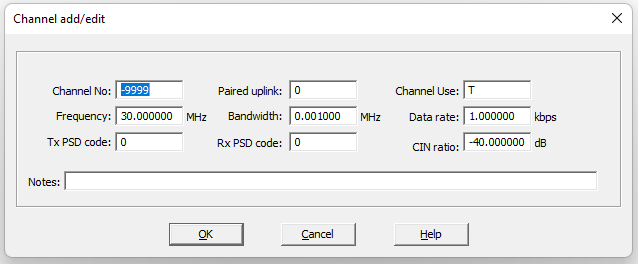
The “Channel No” is just a numerical identifier for this channel, also this is known as the paired downlink as well. The pair uplink and downlink will match depending on the circumstances or system your designing. The “Channel Use” option can have 3 different options. U for only uplink, D for only Downlink, or T for TDD or shared which includes both uplink and downlink. You will set your proper “Frequency” and “Bandwidth”. The “Data Rate” options is only relevant if you care about data rate in your results. The Tx and Rx PSD codes are only used when the user has a PSD code file they are trying to use. “CIN Ratio” is the carrier interference noise ratio, if the users knows a value relevant to their system they may enter, otherwise you can just leave this alone.
You can create or edit as many channels as to be used in your system.
To use the channel plan template file, you will want to go into the appropriate module menu an be sure to point to your .cpt file.
For Example:
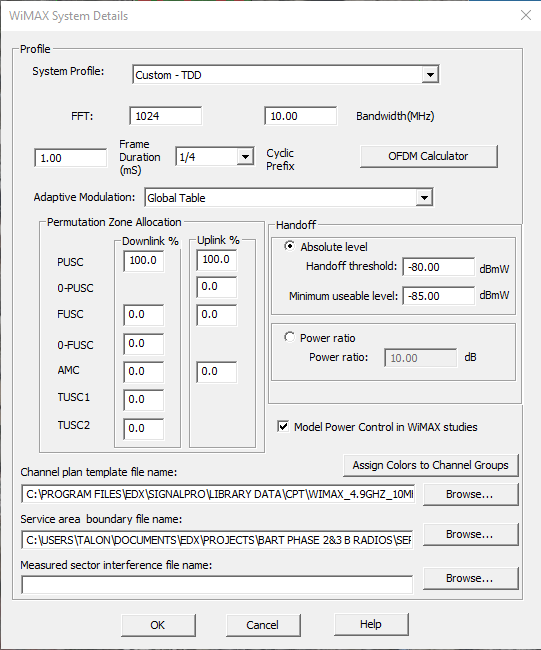
To utilize your channel plan template file for WiMax you will go to Network Design\ Analysis> WiMAX Networks> System Details\ Service Area. You will point to your .cpt file from this menu:
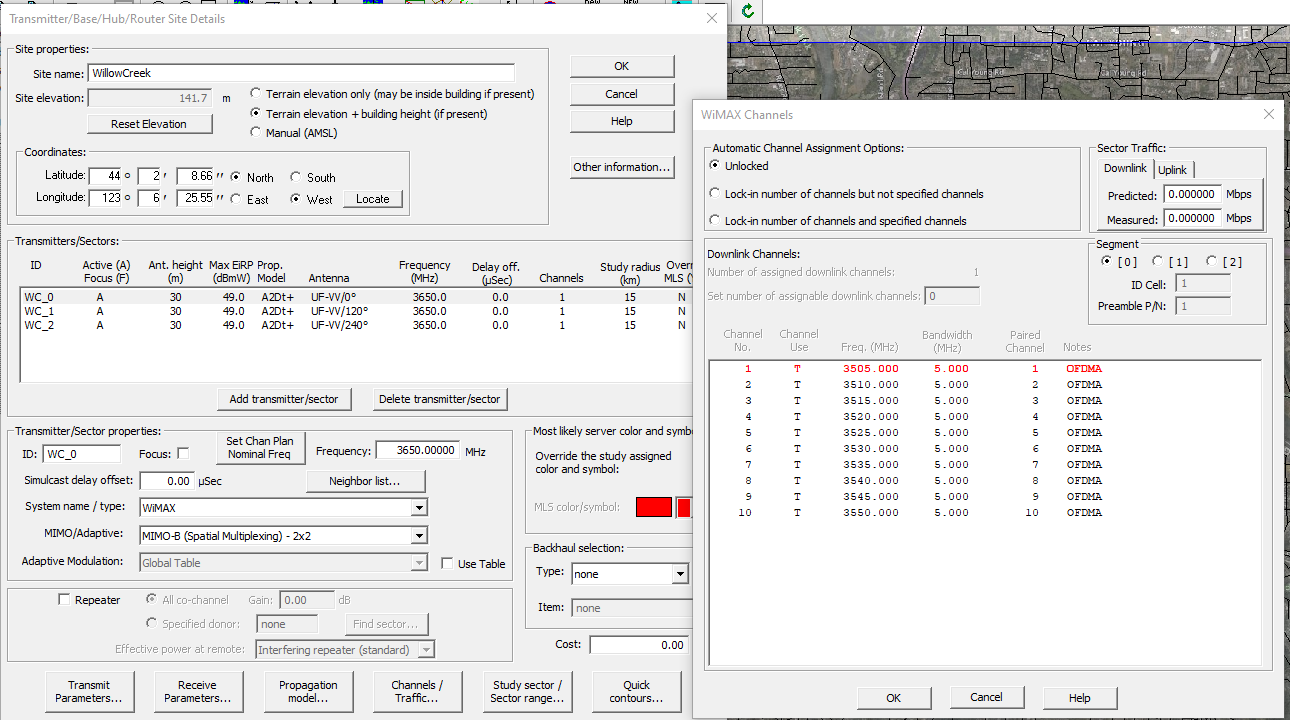
To lock a channel on a sector:
Go into the site properties, highlight the sector of interest, press the channels/traffic button down towards the bottom.
Under Automatic Channel Assignment Options you will click the button next to “Lock-in number of channels and specified channels.
Click on the individual channel to make changes. The red highlighted channel is the currently locked in channel.
For any further issues or questions regarding Channels/Channel Plan Templates please create a support ticket by visiting our Support Portal: https://edxwireless.atlassian.net/servicedesk/customer/portal/2