EDX SignalPro has the capability of tuning your propagation model within SignalPro. Model tuning is one of the final steps a user could take to more accurately represent what is going on in the real world and complete or finish their design. Model tuning is the process of taking real life measurement drive test data and comparing that with predictions in SignalPro. The user takes these comparisons and is given a suggested new best fit loss for each associated clutter category. This new loss is meant to be the most accurate representation of your clutter attenuation values based on the users drive test data. A user would want to do this so that they can more accurately design a live or potential RF system.
The user must first obtain valid measurement drive test data. This is done by capturing RSSI values with a reader while driving through the real world. This drive test data is mostly contained to roads/ streets but the idea is to also capture other potential clutter categories as well to help you more accurately represent the real world in your design. One the drive test data is recorded the user will need to construct a new file to containing the measurement data. This file is a specific EDX measurement data format. You can read more about this format from this article: Creating Measurement/Drive Test Files for EDX
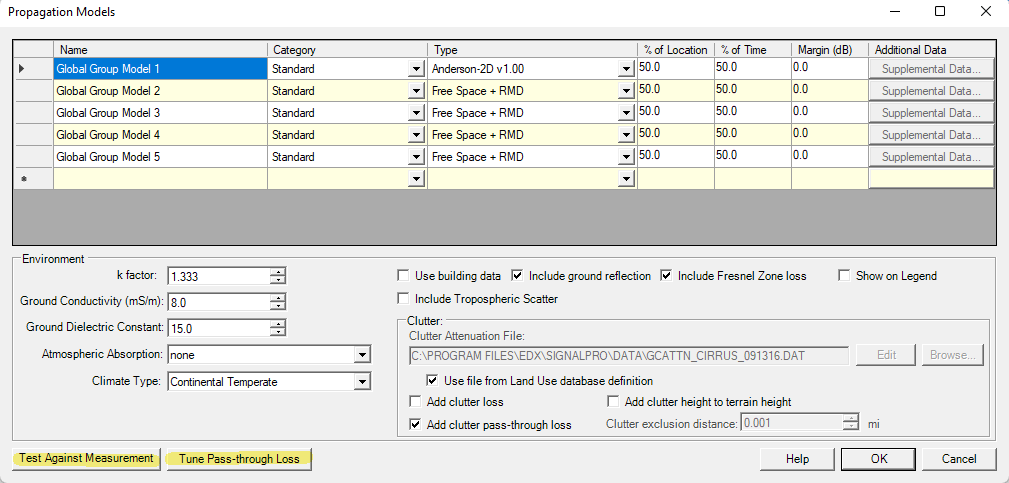
There are two options for model tuning within SignalPro. Both can be found from within the Propagation Models menu. The two options are called Test Against Measurement and Tune Pass-through Loss, they are highlighted in the image below:
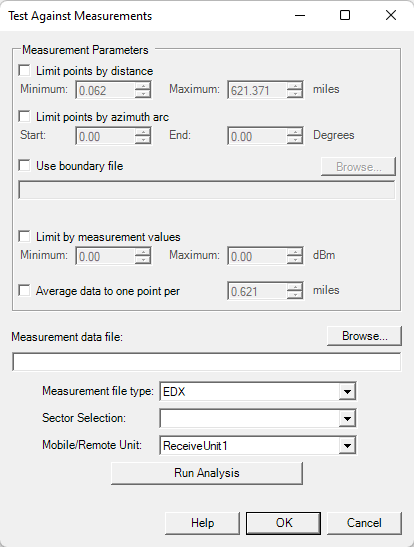
Test Against Measurement: This option only applies if the user has the “Add Clutter Loss” checkbox switched on/active. Press the test against measurement button to bring up this dialogue: