The EDX software can access large data sets, and however this is dependednt on the users processing memory which can vary depending on the users setup.and this can easily push the software processor memory needs past its capacity. The user will first notice the program slowing down; it will take more time to return mouse control, move through dialog boxes, and repaint the map display, etc. In extreme cases, it can cause the program to terminate with “out of memory” errors. If you are experiencing any of these issues then you can consider reducing some of the unnecessary resources controlled by the memory manager.
...
Additional important factors that require significant memory usage that users may consider:
Updating the EDX.INI file:
| Panel | ||
|---|---|---|
| ||
There are EDX.INI settings for handling in-memory cache for Terrain, Clutter, and Buildings. Customers on 10.0 and later can use the new Databases->Database Options dialog to set these values. |
...
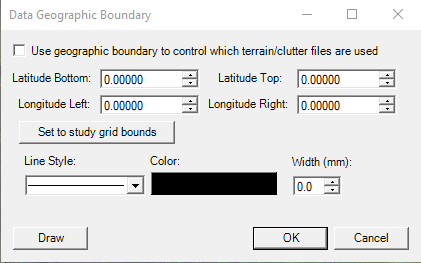
Data Geographic Boundary:
| Panel | ||
|---|---|---|
| ||
One of the more important features of 9.0 was a new data geographic grid boundary. This was an answer to customers who have many GB/TB of high resolution Cirrus files in their data directory. What is described in the INI section above will load ALL files into memory, whether or not they are actually necessary for the area or to run the study. The study may be located in Houston, Texas, but if there are clutter/terrain files from Maryland and Michigan, those will be loaded into memory as well. To create a geographic boundary go to Databases->Data Boundary. In this dialog you can set the boundary to match the study grid boundary, or you can optionally draw a boundary on the screen. NOTE: The boundary MUST, at a minimum, cover the entire study grid. This feature allows you to define a boundary limiting the areas used for terrain/clutter lookups. In other words, if you are in Texas and define a nice data boundary there, those Maryland and Michigan files won’t need to be read and kept in memory. This will provide a speedier experience as it does not need to read in all the other files that fall outside of the boundary. |